Boston Remodeling Story: A Modern Condo Bathroom in Chestnut Hill
This modern Chestnut Hill condo bathroom combines more modern elements with clean lines, and pops of custom blue color as an unexpected surprise. Lead Designer Brad wished the vanity to reflect a cresting wave similar to Hokusai’s The Wave. The back-painted glass and thick quartz in the vanity reflect that imagery.
We worked very closely with this Chestnut Hill condo owner to provide as little disruption as possible through the remodeling process. We updated her master bathroom area to be much more functional for her, as well as creating a modern and more updated appearances to the finishes and color selections. She desired a spa-like feel with subdued colors. A modern Japanese Zen motif was proposed. Between the back-painted glass vanity with the thick white quartz against the bamboo pattern in the floor and accent wall, this calm feeling is reflected beautifully in the finished project. The custom Mexicali Blue vanity expresses personality and elicits delight in a small space, making what could have been a rather boring remodeling project fun and interesting.
- This client (we’ll call her Sara) is a very business working professional. She works long hours, and doesn’t have a lot of time to devote to babysitting errant subcontractors, personally pick out materials without guidance, or really manage the remodeling of her space, but she knows she needs to get it done. It’s old, it’s outdated, and it isn’t really a pleasant space for her right now. Sara plans to be living here for a while, and would really like a space that has enough storage for her needs and makes her feel good to be around. She’s drawn to clean lines, bright colors, and has a more modern aesthetic than many of her neighbors. This being Boston, we very often encounter a more traditional design approach. Sara’s approach was refreshing.
- Sara has been living in this condo for a few years now. When we first met Sara, we remodeled her guest bathroom. After that project was successful, we transformed her galley kitchen. The last puzzle piece missing from her condo update was tackling the Master Bath area, which now looked woefully inadequate in comparison to her other updated spaces. Sara was really drawn to our complete planning model of business. We took care of all the details that she was too busy to attend to, and helped guide her in all the material, appliance, and finish selections so she didn’t feel overwhelmed. She didn’t have to babysit any subcontractors, or make sure that materials arrived on time. We cleaned up after ourselves daily, and made sure that we stuck to the schedules and budgets agreed upon before construction. Not everything went without a hitch, however with her feedback we were able to adapt our ways of approaching things to be better each time we did them.
The client’s thoughts: “NEDC is a great choice for a busy working professional. They accommodated my schedule for design appointments and took the time to understand my goals. I felt very comfortable with the lead carpenter and subcontractors and appreciated their focus on minimizing disruption to my condo unit and building. Additionally, their focus on client satisfaction/feedback and continuous improvement is refreshing. Although renovating is not always fun, NEDC helps to make it worth the time, effort, and cost.”
Before:
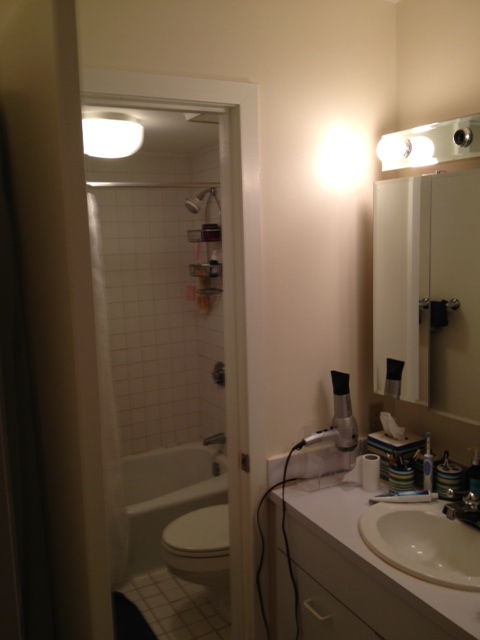
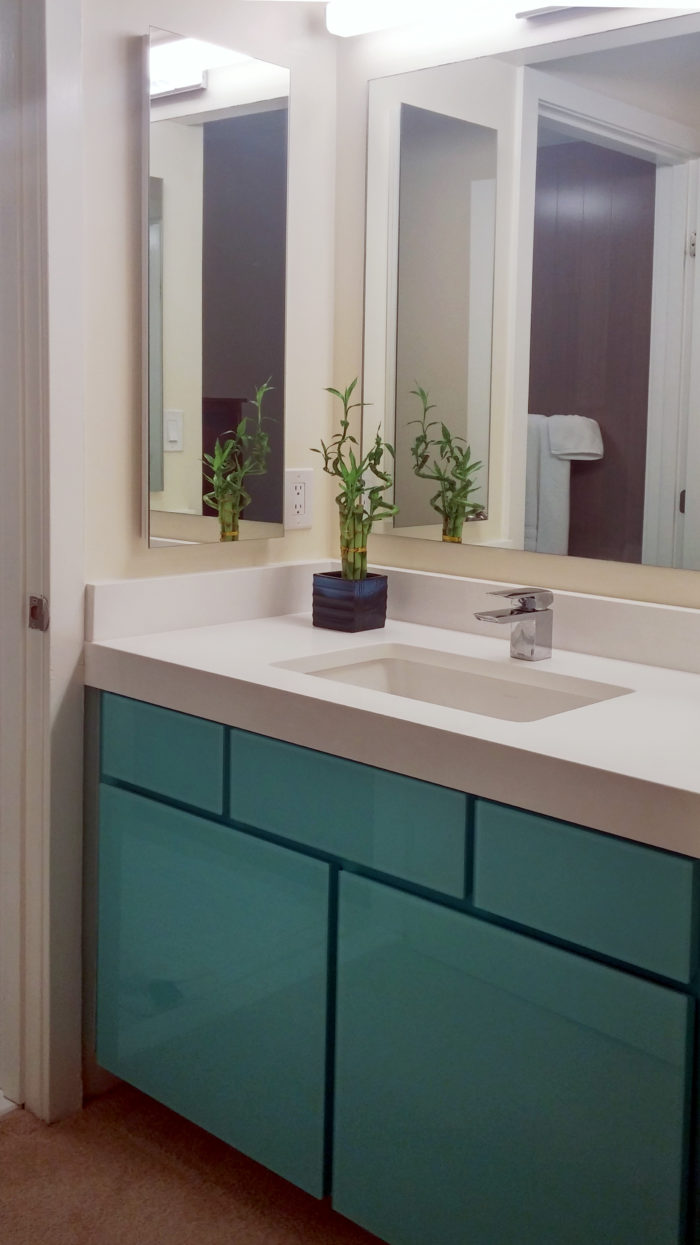
This before image of the bathroom showcases many of the elements the homeowner wished to change- bland lack of color, no organizational structure, poor lighting, ugly outdated tile and finishes… the list goes on!
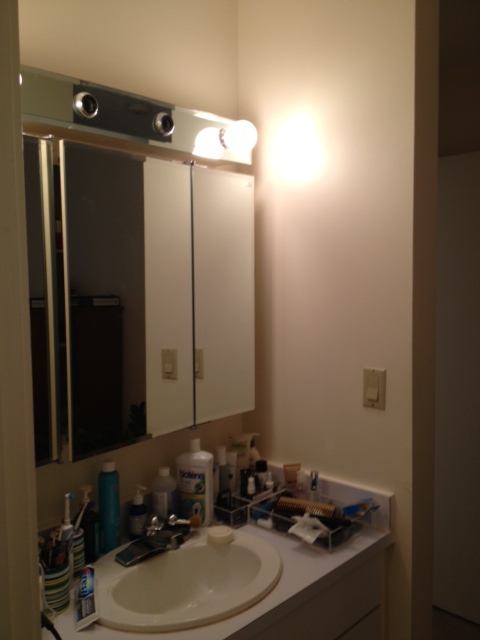
The client uses a lot of different products that have no ability to be stored. Basic cabinets in the vanity aren’t conducive to daily use- things stored beneath ended up jumbled and hard to access.
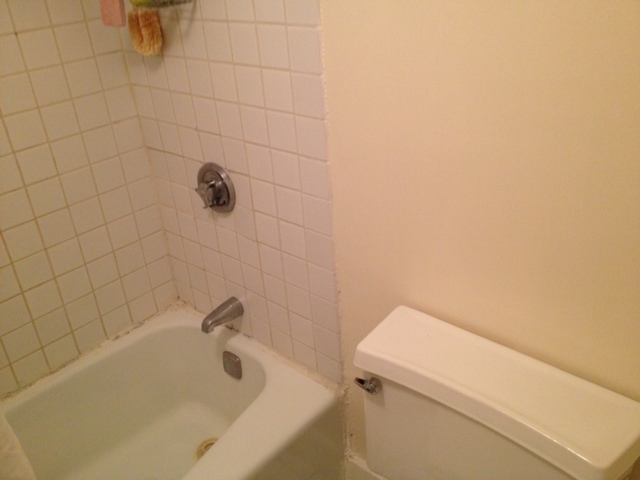
Super basic tile and shower controls in the shower, like what every rental property has. Also, a complete lack of color or visual interest. Certainly doesn’t reflect a “spa-like feel”.
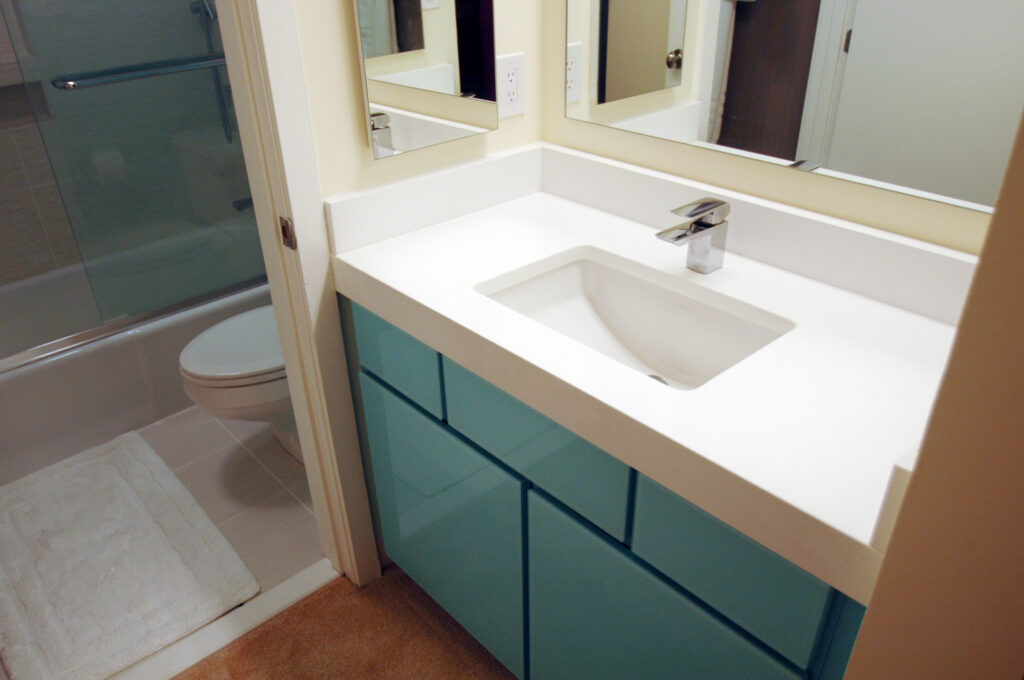
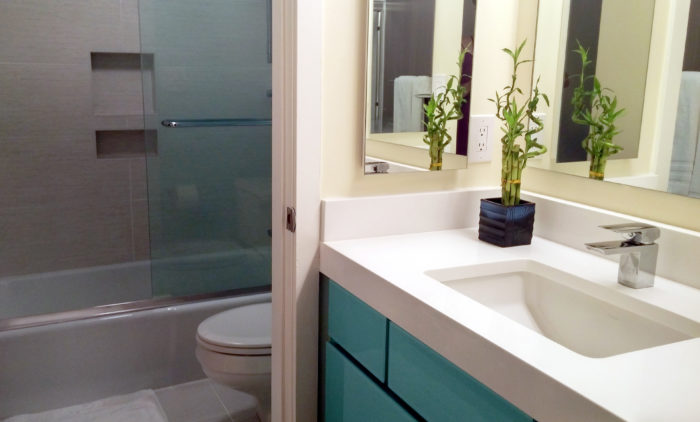
After:
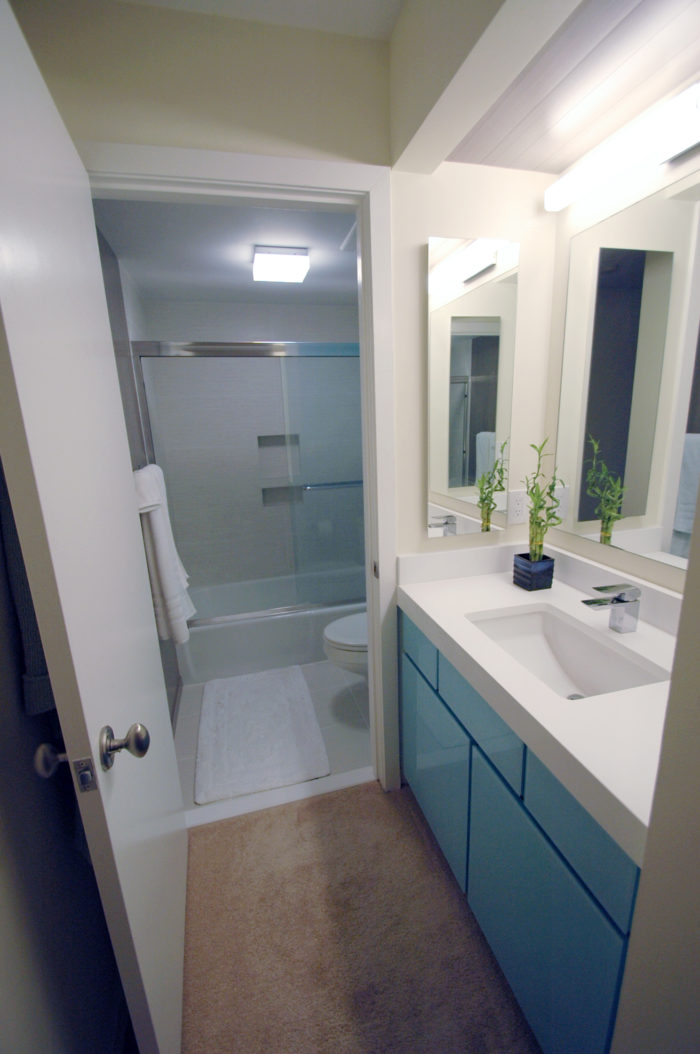
The final result! Better and brighter lighting, different colors, visual interest, modern lines, and customized storage solutions to fit the client’s needs. Totally different look and feel for the space. Calming colors reminiscent of an ocean and bamboo.
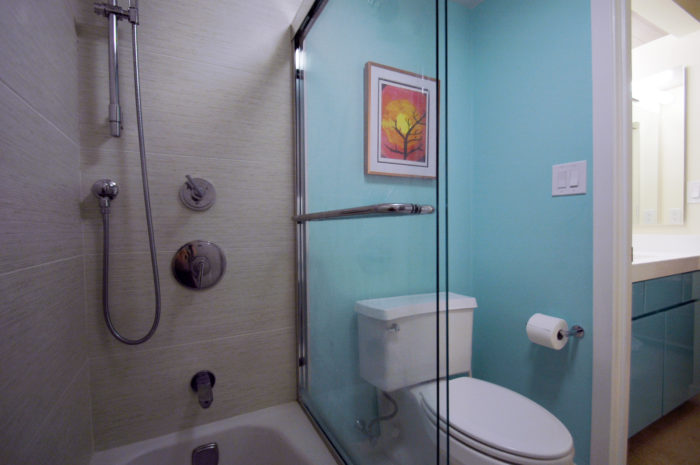
Note the different shower controls – the client now has a handshower in addition to the tub diverter and regular showerhead. A little bit of wall color goes a long way to tie in to the vanity area, and the large format tile on the walls has a bit of texture and color to it.
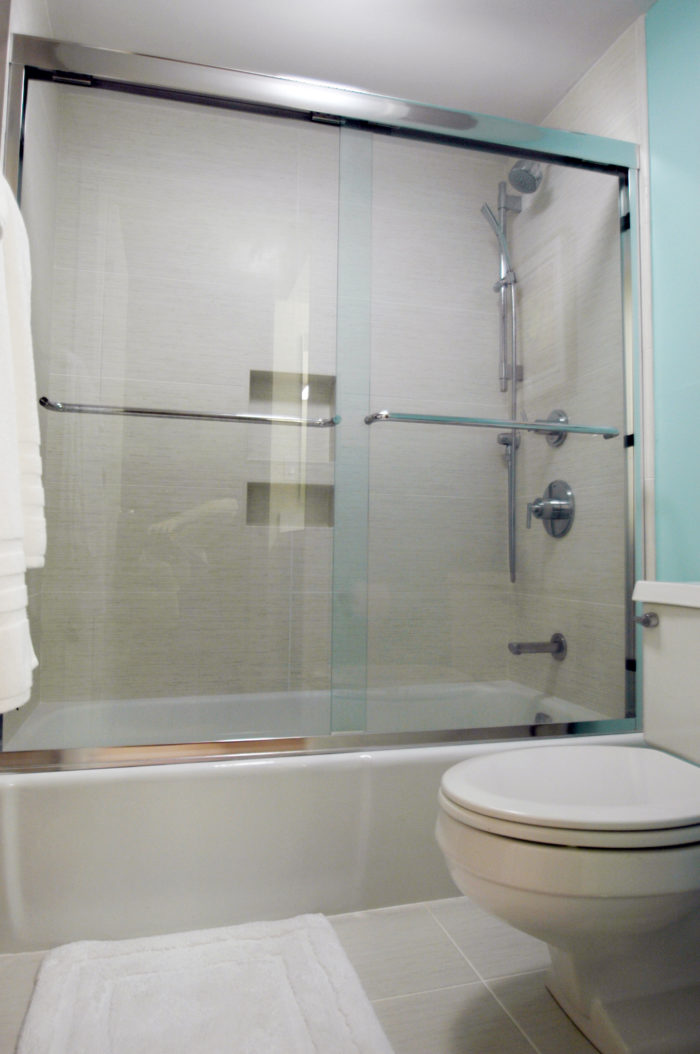
Modern glass doors replaced the existing curtain rod and curtain. Built-in storage in the middle of the wall allows for storage of shampoo and soap. Increased neutral colored lighting also makes a big difference in appearance.
The vanity area was probably the biggest visual change, and the biggest organizational change. Incorporating pull-out interior drawers allowed the client to store her various products. Also, in the mirror you can see the tiled wall in the bathroom that matched the ceiling above the vanity (not shown) to bring in some natural wood tones, and ground the area.
The Story:
The Client’s Needs:
Our Design:
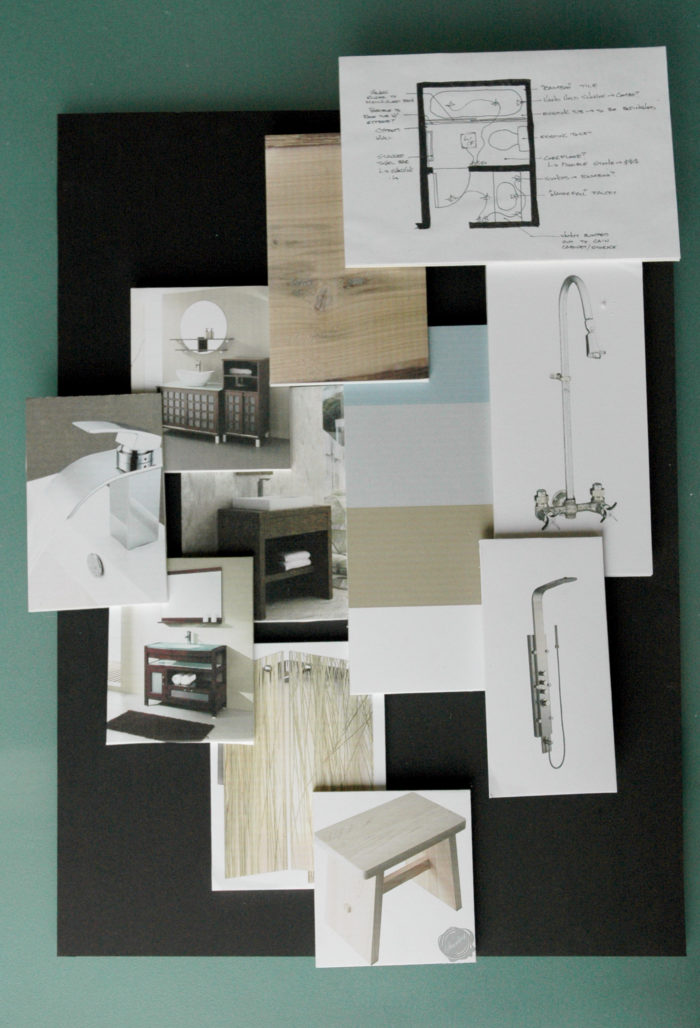
Early designs with the client explored the color palette as well as design direction for the project, setting the tone for the final material and plumbing specifications.
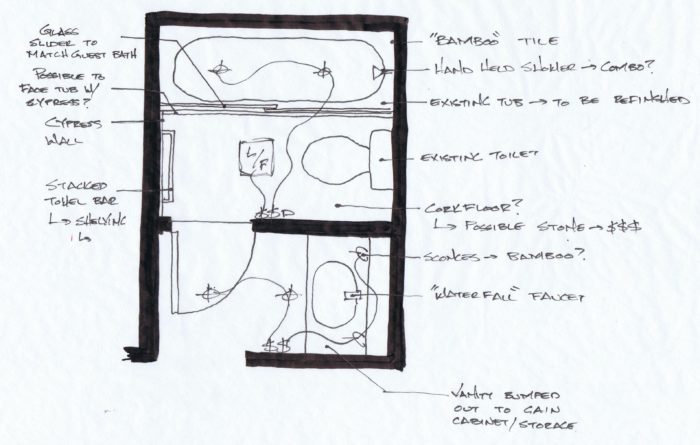
After that initial presentation of design direction, we refined the design and worked out all the little details, like what was that vanity area going to look like?
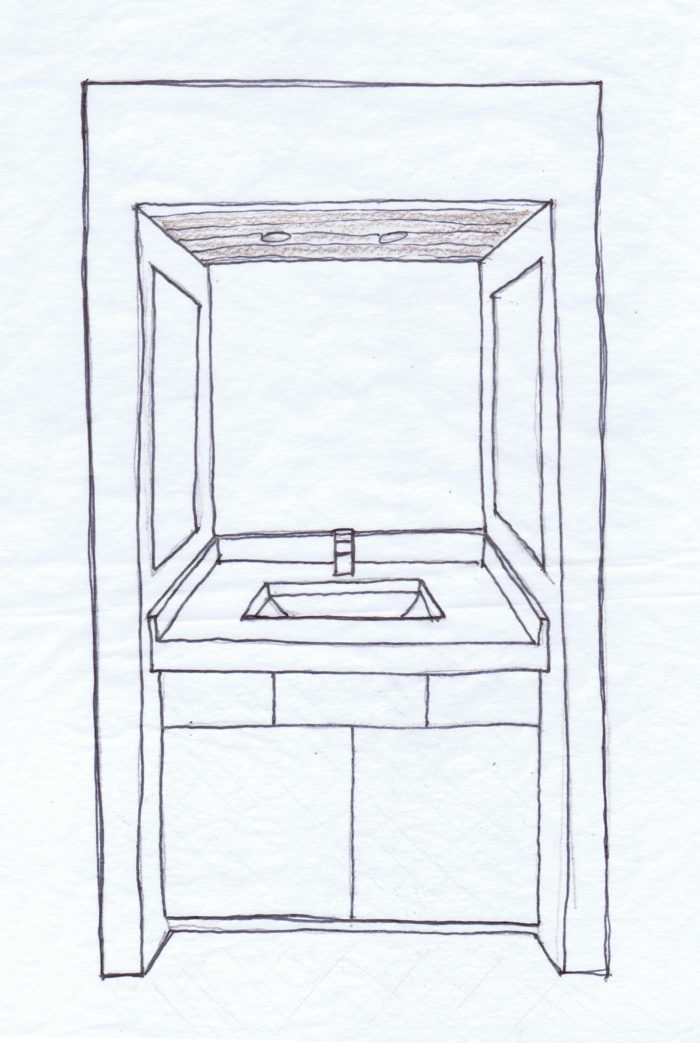
We sketched ideas for how the space would come together- the vanity was a specifically interesting area as it was custom-built as well as a completely custom color, and included an inset ceiling area with a tile finish:
We ironed out details, like the optimal configuration for the cabinets in the vanity that would afford the best use to the client and her specific usage patterns. Here were some of the initial sketches and ideas:
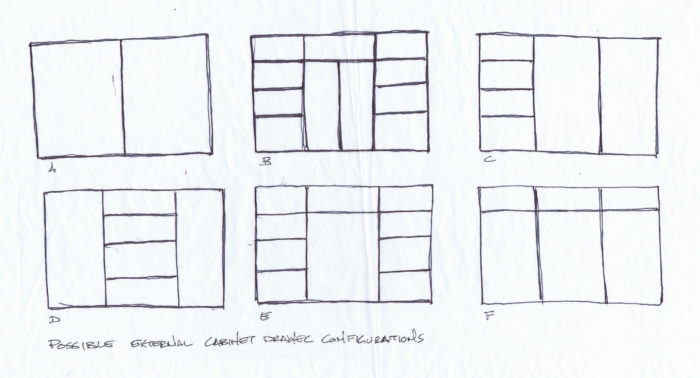
We created very detailed ideas of what the vanity would include and look like, up to the type of joinery used in the drawers (dovetail). Here are a few pictures from the manufacturing process when it was being built:
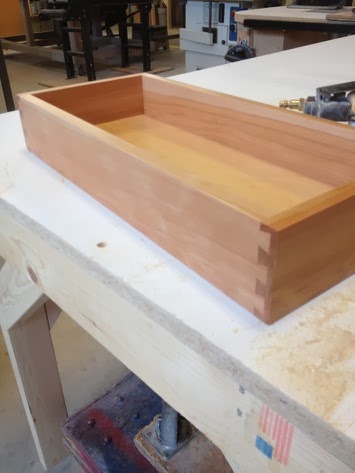
Dovetail joints!
We put thought in to the storage solutions and how they would work to store the client’s specific products and tools, in order to maximize efficiency and meet her priorities:
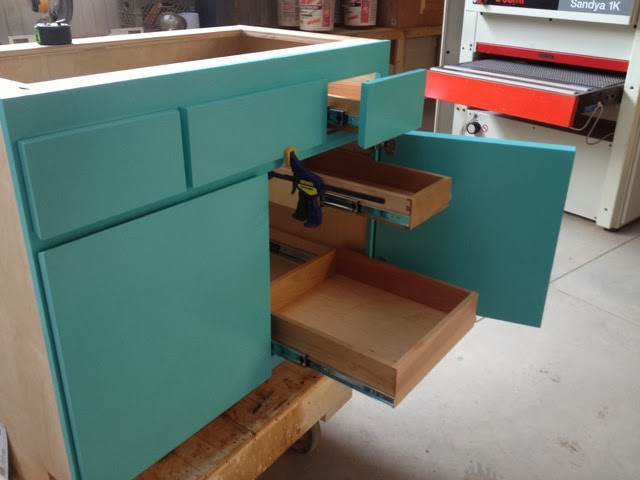
Note the enhanced pull-out drawers behind the normal cabinet doors. Places for everything!
This enabled us to create a pretty realistic rendering of the space before doing any of the work:

This is a rendering that we did for the client prior to construction. If only you could remove walls in normal photography! It is easier to visualize how things come together in this manner.
The Challenges:
1.) Space:
The space was somewhat small, and we were limited by not moving plumbing locations or door locations. Additionally, there was very limited storage space available for our work- the condo was located on the third floor of the building, the building in an area that required parking permits, and no outside storage available for tools, refuse, or materials. The condo was a one bedroom condo with an open floor plan, without a “staging” area that we could store our work materials for the project. This happens with bathroom remodeling, as usually they are very confined spaces. It’s much easier to find storage space when you’re building an addition or doing an entire home remodel.
2.) Storage of materials and tools needed to execute project:
We overcame this lack of space by clearing out a small area of the owner’s dining room and putting down a temporary flooring that we could store a small amount of materials. Additionally, instead of shipping everything to the owner’s location and keeping it on site, we had to order materials to arrive on the job site as they were needed. This meant we needed to be completely on top of ordering lead times to get things exactly when we needed them and not well before. This left very little room for error. This is a pretty common roadblock in Boston remodeling, unfortunately.
3.) Approval by the Condominium Association of all work to be completed
Not a huge hurdle to overcome, however good communication with the board of directors of the condo association in any project taken on is par for the course in multifamily dwellings around Boston. All plans to remodel have to be approved prior to the work being completed, which it was.
4.) Unexpected surprises:
Mold was encountered behind the shower wall during demolition. A mold abatement specialist had to be called in, who determined that the mold was dormant but needed to be removed. A change order had to be issues to fully contain, clean, remove, and measures taken to prevent future mold growth.
Tips for small space remodeling:
- Work out prior to the start of construction where parking is available, and whether or not there is space for a dumpster. If not- what will the solution be?
- Create a staging area for tools and supplies that is close to the room being worked on. Put down floor protection in that area, as well as a pathway to the remodeled space. Figure out if your contractor has storage for materials, or if they will need to be stored on-site, and what their solution is for that.
- Set expectations ahead of time with the work crew about whether or not they can play music while doing work, whether or not they can use your bathroom, and whether or not they can eat their lunches on-site.
- If you live in a condo, it’s always a great rule of thumb to let your neighbors know about the work you’ll be completing. Angry neighbors can make a project go very slowly, and can really create unnecessary stress. Heck, even when the project isn’t in a condo, let the neighbors know. That way they won’t be questioning that truck parked out front every day for the past week, thinking something shady is going on.
- When in doubt, call a professional. Especially with mold. Mold abatement specialists will be able to tell you whether or not the mold growing in your home is dangerous, how to remove it, and how to prevent it in the future and why it’s even there. If you encounter a problem and you don’t know what to do- find a pro.