DIY Teepee for Kids
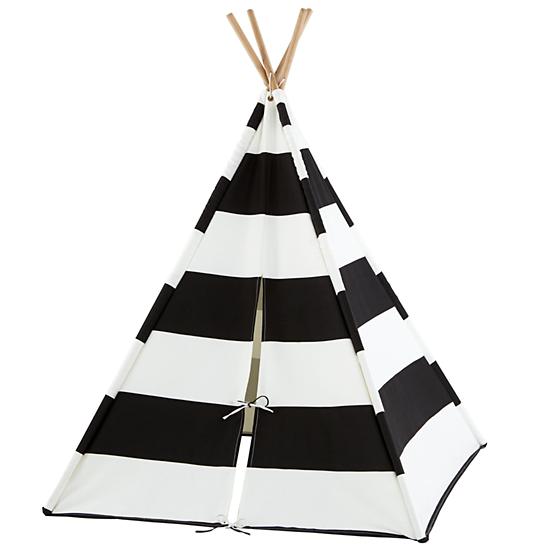
These super trendy tents for kids are super expensive: this DIY walks you through how to create your very own kid’s indoor teepee for under $25, using simple supplies. Requires a small amount of sewing with a sewing machine, although you could probably use a stapler for less longevity.
Step 1: Supplies.
I used the following supplies, although there is a little bit of wiggle room on things.
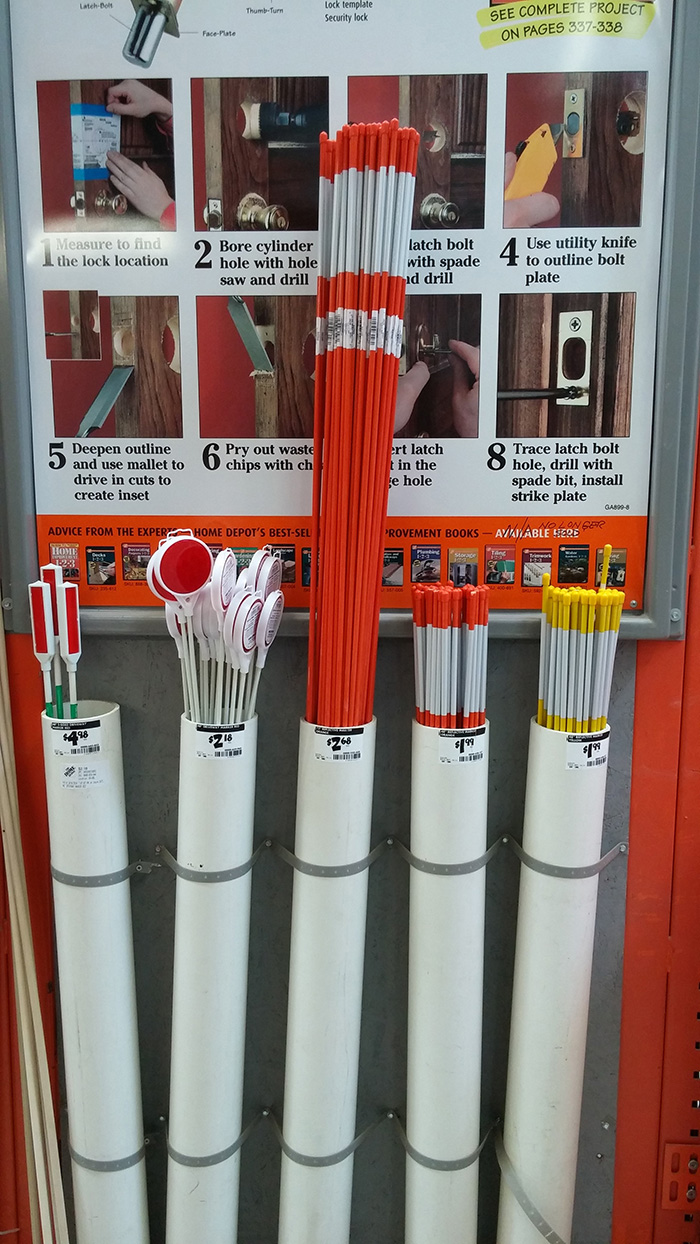
– 4 poles :
I used these awesome reflector poles, meant to mark things for cars not to back in to. I found them at Home Depot for under $3, while I had wooden dowels in my hand similar to what the Land of Nod’s tent uses. I chose to purchase the reflector poles instead, as they are flexible and have little rubber things on the end that keep them from being sharp in any way. I like the flexibility of the poles, as my two year old likes to jump on things often.
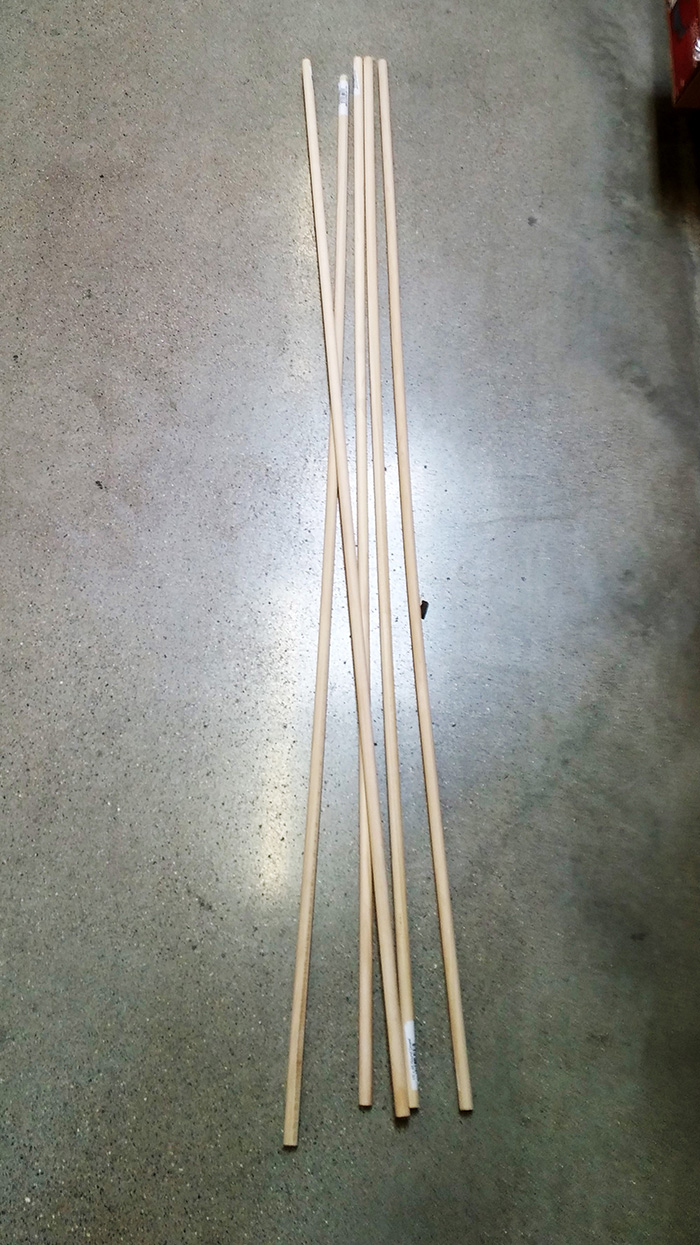
These wooden dowels above are great, but I opted for the reflector poles shown below:
– Fabric for tent :
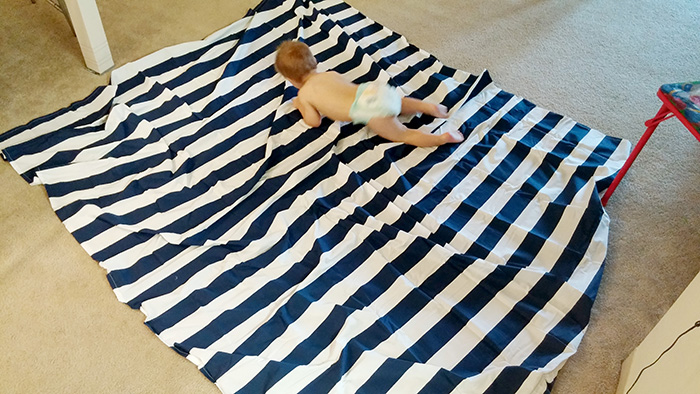
I bought a sale sheet set at Target for a full size bed. These sheets were $12, and exactly the type of striped fabric that I wanted. You could easily use any type of fabric that you’d like, but a full size flat sheet works well. Usually, the striped look is pretty trendy, and other patterns can easily look amazing. Cameo: my son Kelton.
– A sewing machine with appropriately colored thread.
I have a pretty basic proficiency at using a sewing machine- this doesn’t require anything complex other than a straight stitch to create channels for the tent poles to sit within, and finishing any raw fabric edges.
– Sharp scissors to cut fabric
The sharper your scissors, the easier cutting the fabric is.
– Something to measure and mark your fabric with
– Twine, gimp, string, or a thick hair tie to secure your poles together at the top. I used two thick hair ties and found it remarkably excellent.
– 5 Small Grommets (optional)
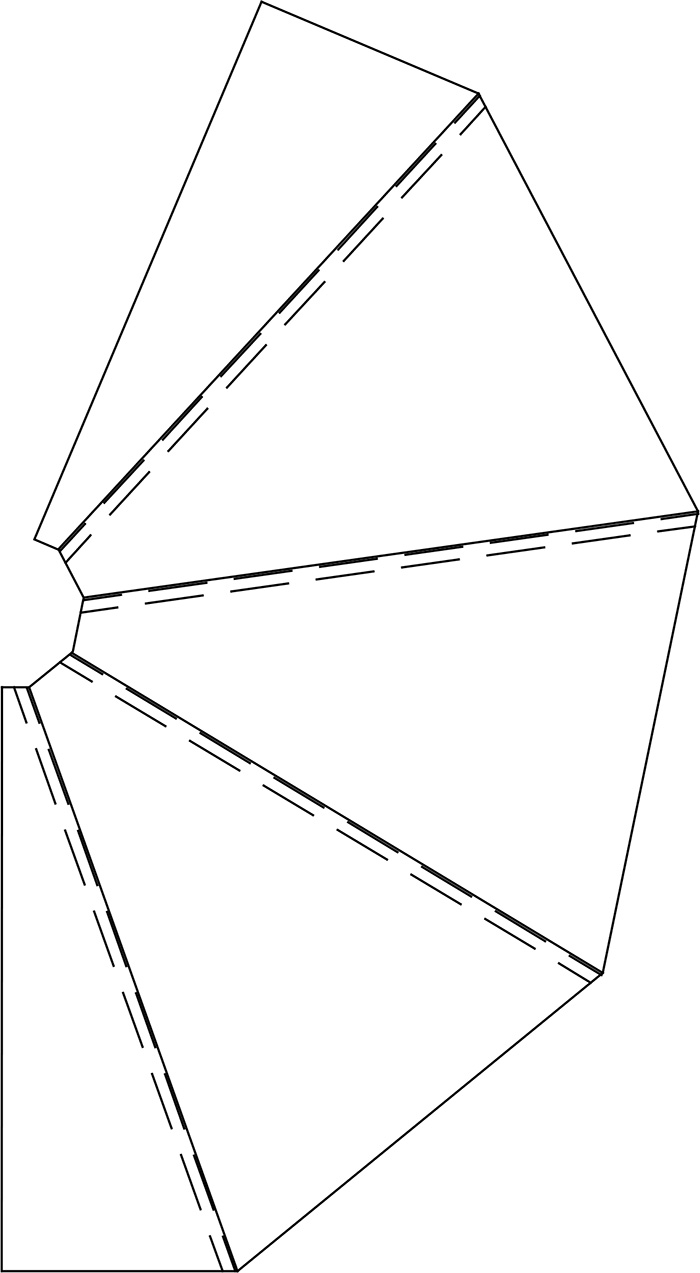
Step 2: Mark and Measure your fabric! I used 4 triangular panels (with the tops cut off) that are 3’9″ wide and 5’2″ tall, with lines marking 1.5″ inset from the edges for sewing.
After playing around with the measurements, I decided to go with a 45″ square base. This fits better in my home, although the tent is a little narrower than some of the pictures I’ve seen of tents you can buy. I constructed this by cutting out four separate triangles, and sewing them together with the seams for the poles to fit through on the inside of the tent, rather than on the outside like our featured image.
Measuring a triangle on fabric can be tricky. I used the following overall dimensions to execute my triangles. 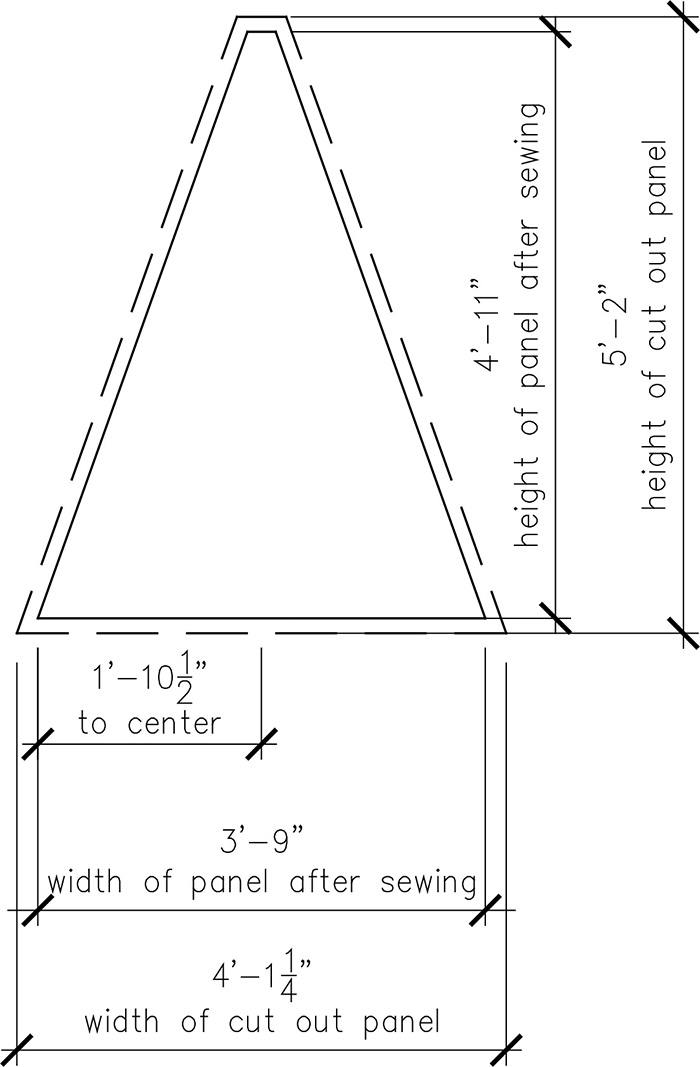
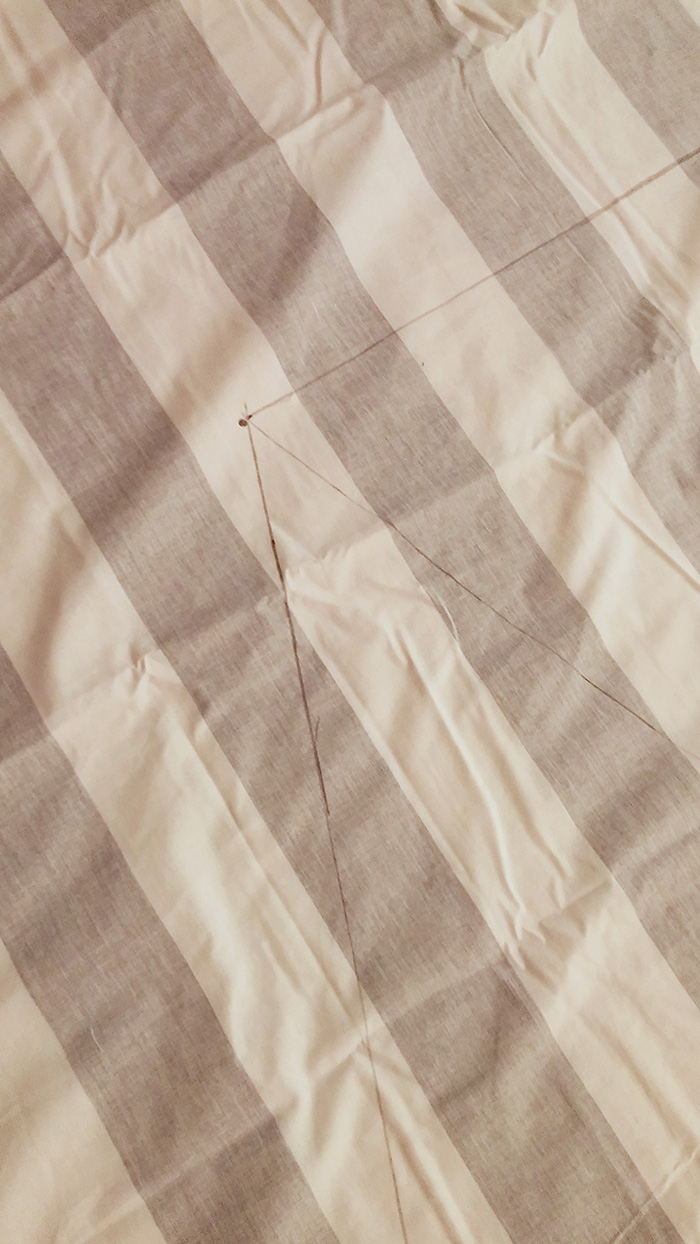
The best way to execute this is to start in one corner of your fabric and make a dot or marking, and measure to the midway point at 1′-10.5″ and put another mark, then finish off the dimension at 4′-1 1/4″ with final mark.
Use the center point, and measure upwards (I used the stripes as a guide to make my line perpendicular) 5′-9″ and made a mark. I made an additional mark 8″ down, to be the top of my panel. I then drew lines connecting the dots, making sure to make them as straight as possible. I kept them straight by using a measuring stick as a guide.
After you have the overall dimensions of the triangle, you will draw a second set of lines that are inset, about 1.5″ deep. This is easy to do with a yard stick, as you can line up the yardstick on your line, and draw with a pen tracing the yardstick. This line will be your guide when you sew the channels for the tent poles to go inside of.
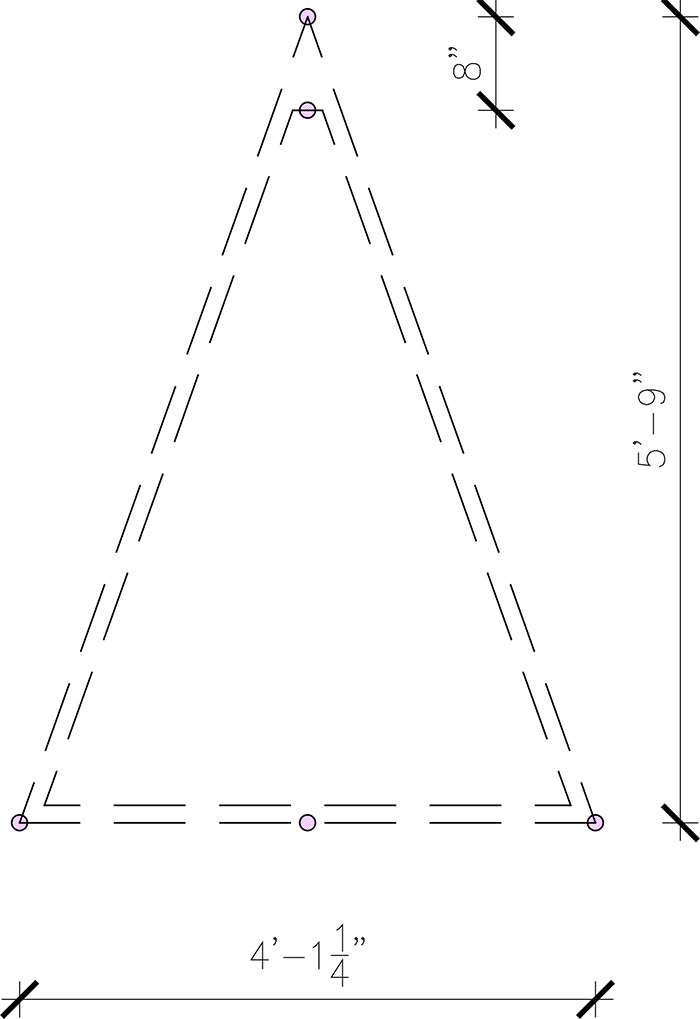
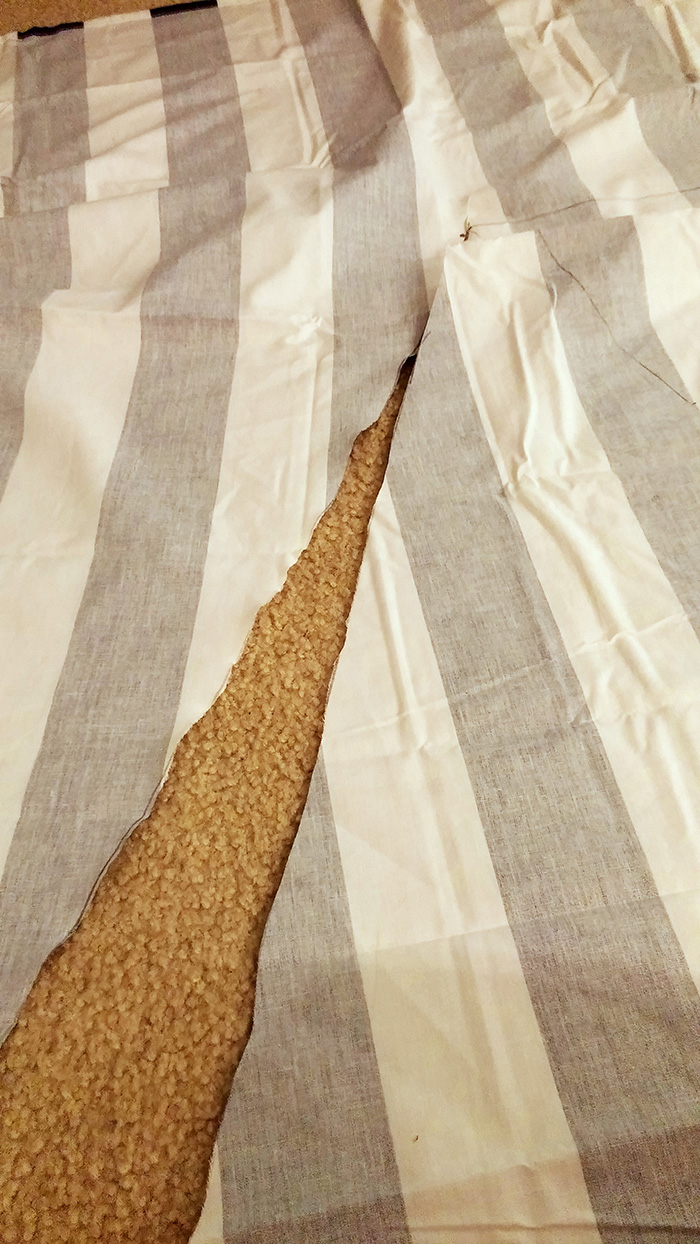
You will need 3 full panels, and one additional panel cut up the center to make the doorway. Measure twice and cut once! Make sure you measure out all of your triangles BEFORE cutting any of them, that way you can ensure that your triangles all fit on your fabric. Not all flat sheets are the same size: make sure yours fit! Mine had plenty of extra fabric, and this is how I laid them out:
Step 3: Using the outside line that you drew for each panel, make precise cuts. It will be hard to sew later if you don’t cut it straight, so be careful.
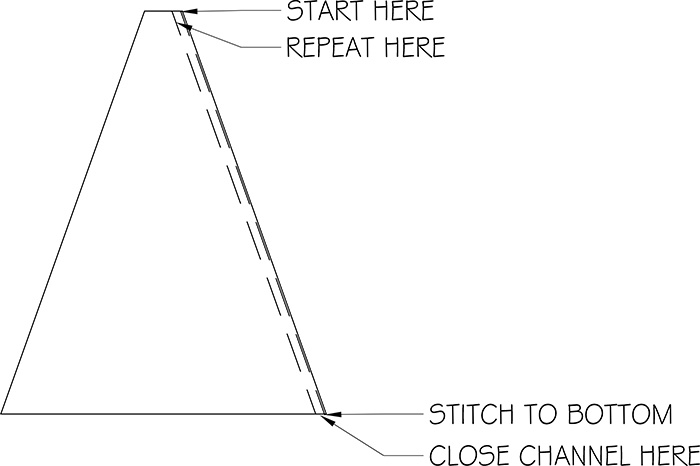
Step 4: Sew panels together, and stitch a channel for the poles to be inserted. Close off the bottom of the channel at the base of the triangle shape so the poles don’t stick out.
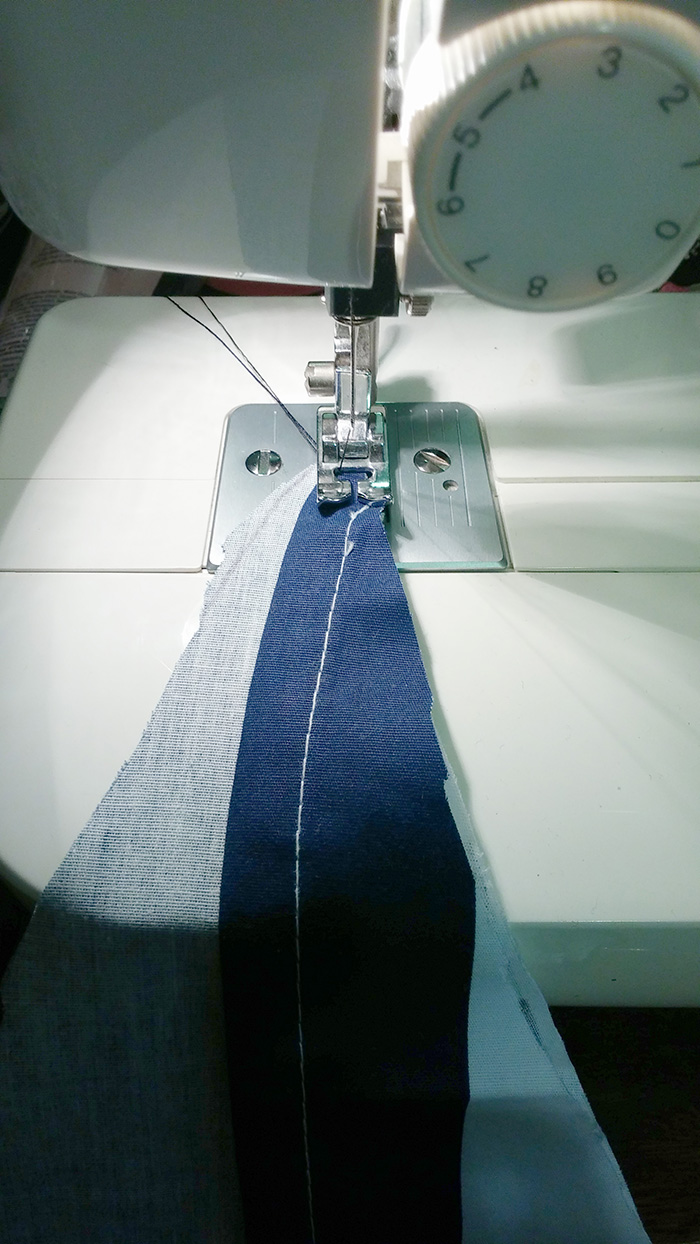
Do this one at a time. Take one of the half size panels and one of the full size panels and line them up along one side with narrow and wide parts aligning, pattern facing pattern. Start at the top of the panel at the narrowest part, and stitch the two panels together as close as you can to the edge (usually about a 1/4″ for most people). Then, make another stitch about 1″ offset of the stitch you just made, along that line that you drew when you were measuring everything out. This creates the channel for your pole to go in to. Make a quick stitch over the bottom of the channel near the wide part of the panel, so that when the pole is inside it doesn’t poke through the bottom.
Congrats! One tent pole housing is complete.
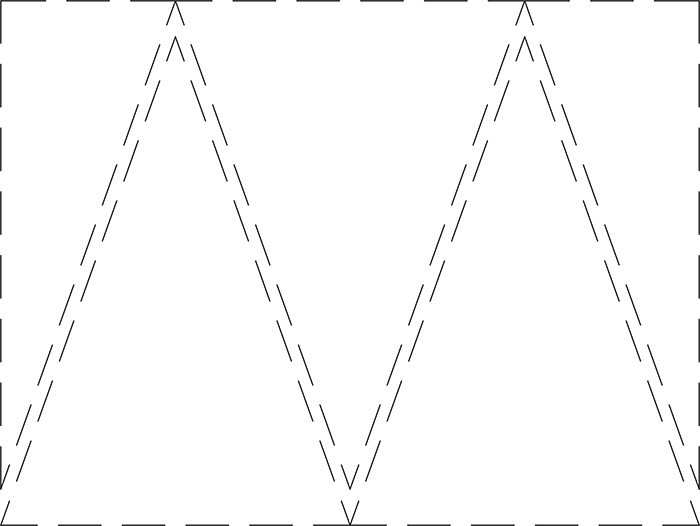
Now, take the panels you just sewed together, and straighten them out so that you have one continuous piece of fabric. Take a new full size panel, and line it up pattern facing pattern to the full size panel half of the stitched section. Repeat the process above to create a second tent pole channel. Keep doing this, keeping in mind to stitch with the pattern facing pattern. Your last panel will be the remaining 1/2 panel.
At the end, your piece of fabric will resemble this:
At this point, you should finish off any of the edges that you might have left raw. You don’t want the fabric to unravel itself during use (it will leave a lot of mess behind). for me, that meant one of the half panel edges and some of the bottom edges. I just folded the fabric over by 1/4″ and stitched it shut in the same manner that I sewed the panels together.
Step 5: Put a small circular hole at the top of each panel, about an inch down.
This will allow us to keep the panels from falling down when the tent isn’t fully extended. Grommets are great to do here, if you want the fabric to have more longevity. With just a hole, eventually the fabric will rip.
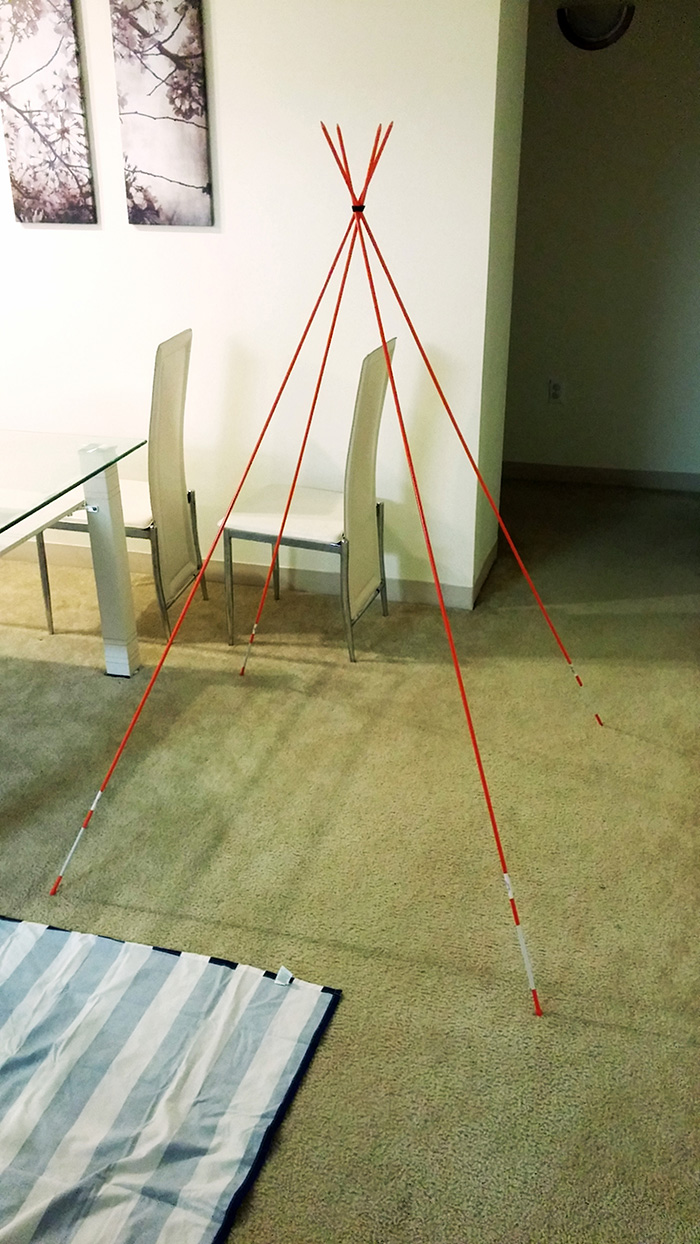
Step 6: Slide tent poles in to their sewn channels, and gather them together like a closed umbrella.
Step 7: Affix your tent poles together at least an inch above where the fabric reaches to.
I’ve found that the best way to do this was to use two of those super thick hair ties. They’re flexible enough to adjust if I need to, but strong enough to hold together. You could probably use rubber bands, or twine, or gimp. This is easier to do with the tent closed, and adjust once it is open.
Step 8: Open the tent! You may have to adjust the footing a little for the tent to be even.
Step 9: Using a little string or twine, attach to tops of the tent flaps to the tie holding the poles together using that hole you made.
This is more for security than anything else- the tent will stay up without this measure, but when you close it the fabric will slip down if it is not secured. If you secure it, it is much easier to take the tent up and down without having to “set it up” each time.
Step 10: Sit back, and relax. You’re done! At this point (actually more like step 8) my toddler was already jumping around inside the tent and screaming. Chances are if your child is around they’re anxiously awaiting the chance to use their new hideaway.
My favorite part about this is that when it’s not in use, it’s like a big outdoor umbrella and can close and be stored away under the couch.