12 Days of DIY: Salt Dough Ornament Recipe
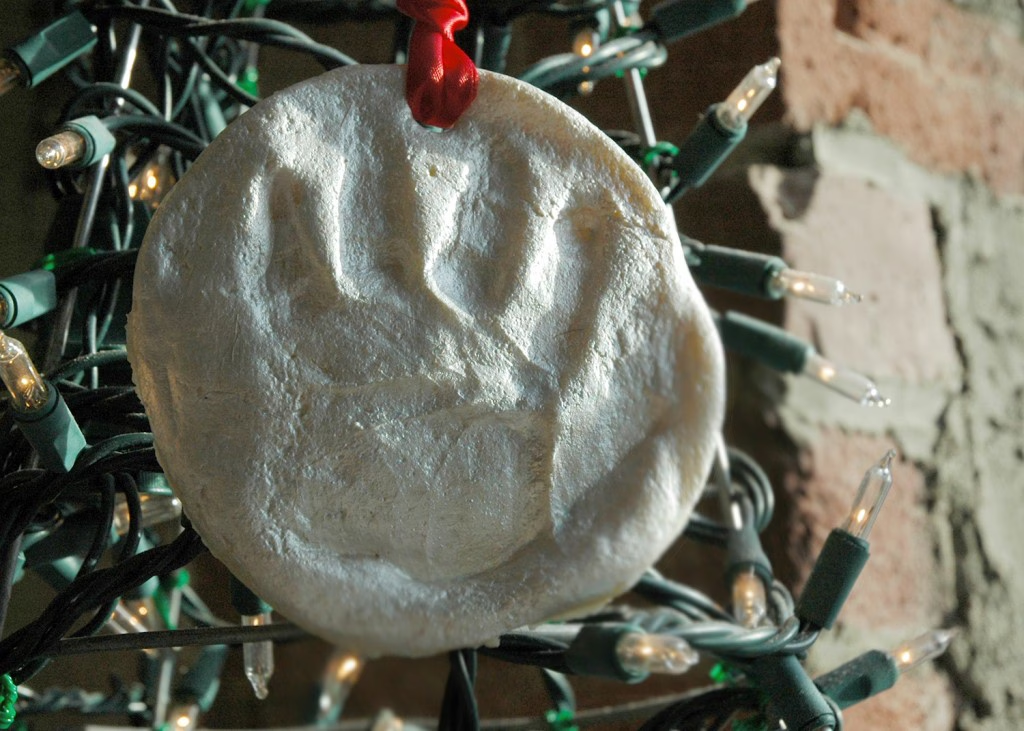
Wandering around toy stores buying Christmas presents, I often came across this neat little kit for making hand print ornaments. Sold for $12 in most places, it only yielded 1 or 2 ornaments. I thought the idea was fantastic and would make a great gift for grandma and grandpa, but really? 12$ for mold of a kid’s hand?
After doing a little research, I found that the internet is a treasure trove for duplicating things like that. I made these hand print ornaments for FREE using things I had around the house. Additionally, you could easily use cookie cutters and cut out cute shapes to paint with a child slightly older than my 11 month son.
This salt dough recipe is super easy. The only hard part is getting your child to put their hand flat on the ornament to mold it with out making a fist or trying to shove it in their mouths.

Click for this salt dough recipe and how to execute it.
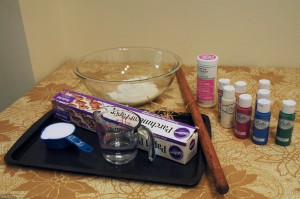
Ingredients:
Salt Dough Ornament Recipe:
- 1 cup flour
- 1/2 cup salt
- 1/2 cup water
Other useful tools:
- rolling pin
- medium bowl
- parchment paper
- baking sheet
- cookie cutters (I didn’t do any of these because I don’t have any)
- ribbon
- straw
- baby! (optional)
Note: I would give yourself 2 days to complete this project. Even though it isn’t super time intensive to craft, it does need to bake for a very long time, and you can’t paint it while it is still hot.
1.) Assemble your supplies and preheat your oven to 200 degrees.
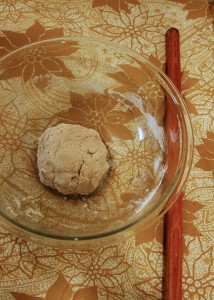
2.) Mix 1 cup flour with 1/2 cup salt until salt is evenly distributed
3.) Add 1/2 cup water and mix it together until it is like dough; if it is very flaky add a tablespoon of water. If it is very sticky, add a tablespoon of flour.
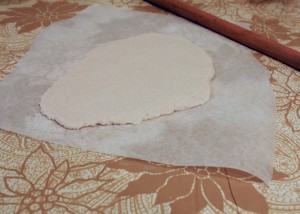
4.) Roll out the dough on a piece of parchment paper. You will want the dough relatively thick for handprints, as you will need to push the hand in to the dough. I recommend about 1/4″.
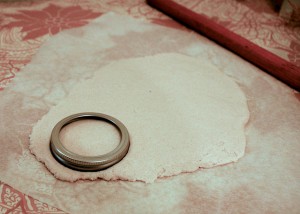
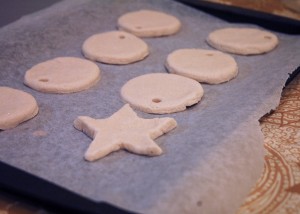
5.) Either cut out your shapes with your cookie cutters, or use a bowl or mason jar lid to cut out some circles in your dough for handprints. Note: I did not plan terribly well, my beautiful circles had to be stretched out to fit my larger-than-I-thought toddler’s hand.
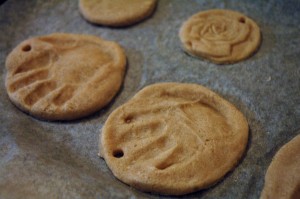
6.) Use a straw to cut a hole in the top for the ribbon to hang. I poked the straw in to the dough, and the straw kept the piece inside until I blew it out. If you don’t have a straw, just poking it with a toothpick or something pointy and enlarging it will work just fine.
8.) If you’re using a hand, try to get your child to give you a hand or foot print. Foot prints are MUCH easier, they can’t grab as well with their feet as their hands. (this was definitely the hardest part of the project)
9.) Transfer your pieces to a baking sheet.
10.) Bake for 2 hours at 200 degrees (check, mine needed a bit longer so I went for 2 1/2).
11.) Let them cool completely, possibly overnight
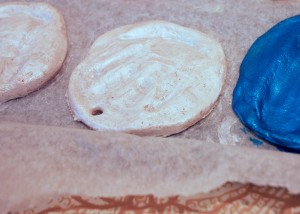
12.) Use some sort of acrylic paint or modge podge to seal the dough for years to come. I used my favorite Bella acrylic metallic paint on some (Home Depot; set of 12 was about $10), and I have a Martha Stewart High Gloss modge podge that I put on a few ($4.99 for MS brand but any modge podge will work, or even elmer’s glue).
13.) Tie a ribbon on your ornament and either hang it or gift it!
Congratulations! You made it through the 12 Days of DIY!