12 Days of DIY: Paper Scrap Trees!
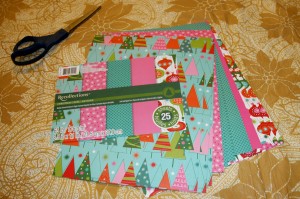
These little DIY decorative trees can be made out of any paper you have hanging around the house. As I celebrate Christmas and tend to be very crafty, I have a selection of Christmas themed paper around my house as well as wrapping paper that I can use for this project. If you wanted a more non-denominational tree, you could certainly do this with blue and white paper in order to give a more wintry than holiday oriented appearance, or any other paper you may have. You could even use reds and pinks for a Valentine’s Day Tree if you were so inclined.
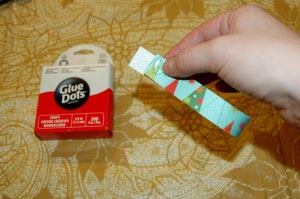
This project uses very few resources: paper, scissors or a mat cutter, and glue dots are the only materials that you need.

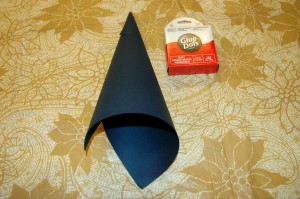
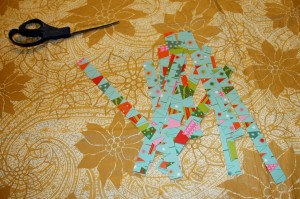
1.) Start with 1 piece of paper, as large as you have. Card stock is easier to use, but any type of paper will do in a pinch. Take that paper, and wrap into a cone shape; tape or glue dot the edge to hold the form.

2.) Take a look at where you might have a gap in the base of your cone. Because you are starting with a square piece of paper, it will not be the same length along the base of the cone and you will have to trim it. Start at the point of the gap, and trim along the bottom. The first trim might be a little jagged or uneven (like you see in this picture).
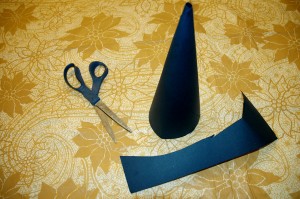
3.) Even out the base of your cone so that your tree isn’t standing crookedly.
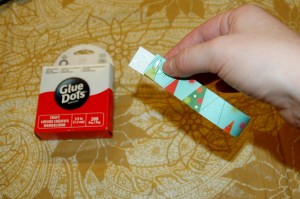
4.) Take whatever scraps you feel like using as your tree leaf/branches, and cut them in to strips. Make sure that your strips are long enough to make a loop out of.
Note: You can play with the thickness and length of these strips to suit how you wish your tree to appear. Taller trees will generally want thicker and longer strips, while shorter ones gravitate towards thinner, shorter strips. Mine are roughly 1/2″-3/4″ wide and 5-6″ long.
5.) Now, use 1 glue dot to affix the ends of your paper strips together as shown, and then take another glue dot and stick the strip to the cone that you created.
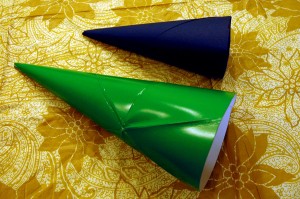
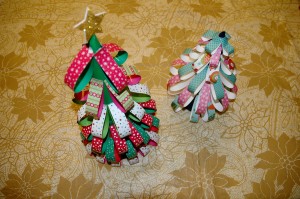
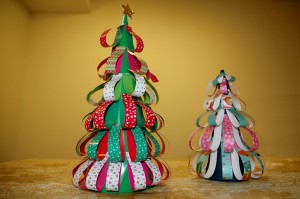
6.) As a rule of thumb, I tried to get my strips hang the lowest part of the loop towards the base of the cone, and then on the second row I overlapped the bottom of the new strip with the top of the old by about 1″. Again, this measurement is at your discretion. Just keep layering them until you reach the top! I made a star for the taller tree, and left the other alone.
See yesterday’s Cinnamon Stars, Spice Bundles, and Cinnamon Wrapped Candles!